How we study building stones (Lead authors: JT, PJB and WGT)
|
What age is my building stone?
Please go to the file below for this information plus other details.
|
How do I find my Building Stone?
If you have a Building Stone name but can’t see where to find it here, please go to the file below for directions
| ||||
Stone in Archaeology Database: University of Southampton
An excellent site with photomicrographs. Where used on this site the following attribution applies:
Data collated, compiled and written by Kathryn Knowles with additional input provided by Roger Winterbottom.
Images captured by Fiona Lewis and Roger Winterbottom.
Database Project Manager: Kathryn Knowles.
Database and website developed by Fiona Lewis.
Data and Images are © the property of The School of Humanities (Archaeology), University of Southampton.
For individual images the abbreviated attribution is :
KK/FL/RW. U.Soton. Visit the site from the link below.
How we identify Building Stones
|
In churches and other buildings in Dorset which use natural stone for their construction, the building stones are sedimentary rocks ranging in age from Late Triassic to Late Palaeogene. Most are from Dorset quarries but some are imported from neighbouring counties and NW France. In some interiors, more exotic and older rock types can be found.
The sedimentary rocks used comprise a great variety of limestones and sandstones deposited in a range of environments. To identify the source of any building stone we need to identify the specific rock type, noting its characteristics: colour, composition, texture, sedimentary structures, body fossils, trace fossils and weathering appearance. |
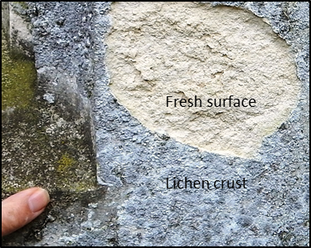
This is not always straightforward as the exposed surfaces are often obscured with fungal/algal growth. One has to search for a worn or damaged portion with a fresh surface – hammers are forbidden! Sometimes broken pieces can be located on the ground and examined. Sometimes recent repairs show a fresh face, but may not be representative of the original build.
Some characteristics are diagnostic so some building stone can readily be identified, others are more tricky especially when the rock type is no longer known from outcrops (i.e. the source has been quarried out, top soiled or otherwise grown over and/or the location unidentified) |
We employ four methods:
1) Eyes, touch & camera (WGT)
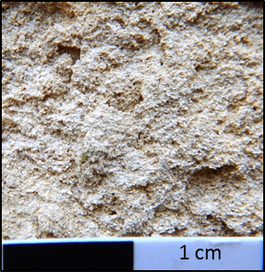
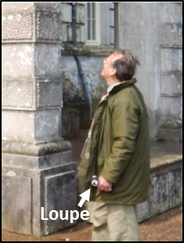
When considering a block of stone in a church wall, for example, we note the above characteristics initially from a metre or so away, then close-up. A light touch helps with assessing texture. To record this macro-appearance we take colour digital photographs with an indication of scale (a dedicated scale or finger, pencil, coin). With a close-up/macro setting we can capture diagnostic details (e.g. fossil type, bioclasts, ooids), again ideally with a scale.
|
2) Loupe/hand lens & camera (WGT)
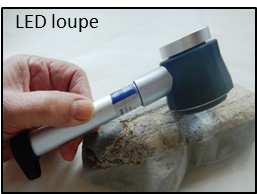
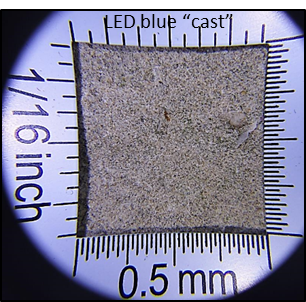
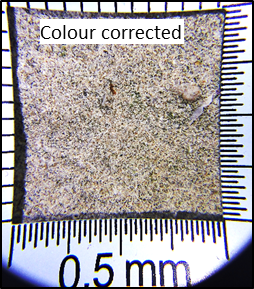
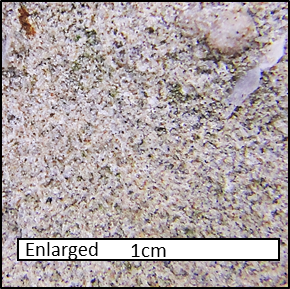
A 10x magnification hand lens is essential for looking at details of the rock type. Recently “LED loupes” have become available through which, if your camera permits, one can take images of a 2 x 2cm area with scale included. Colour correction is needed because the LED light is blue. With the scale known, one can enlarge to see more detail. These images are Wardour Main Building Stone (qv), a fine-grained glauconitic quartzose bioclastic limestone (calcarenite, grainstone-packstone). |
3) Thin-sections (PJB)
Photomicrographs (photographs of thin-sections) have long been used by geologists to illustrate the microscopic components of rocks and to give them precise names. To identify building stone we collect samples from: quarries that supplied the stone (or equivalent exposures of the outcrop); redundant stone; trodden-in particles dating back to construction; weathered detritus from buildings.
There are seven steps in the process (additional refinements and tools may be used for some sediments and harder igneous and metamorphic rocks):-
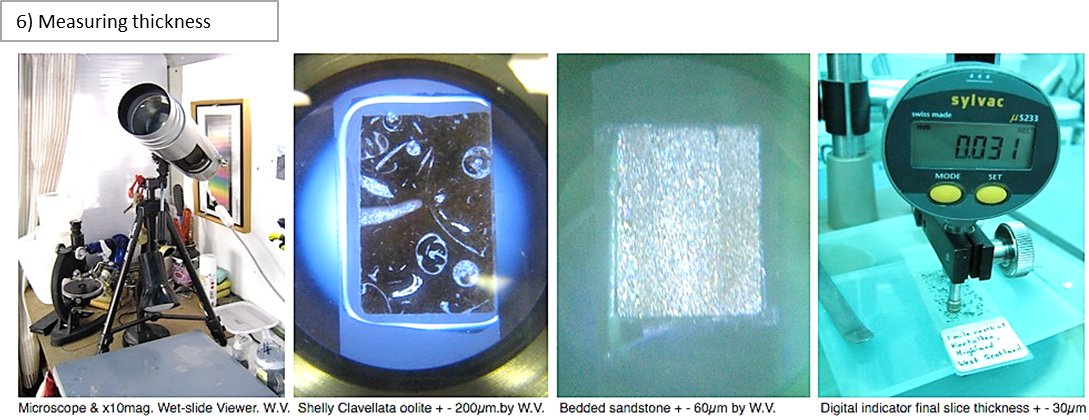
These rock samples are made into, or sawn as, a 3 x 2 x 1cm block to be polished perfectly flat and glued onto a glass microscope slide of around 1.0 to 1.5mm in thickness. The block is then sawn off to leave a 0.5mm thick 3 x 2cm slice of rock firmly fixed to the slide with a resin or ultraviolet adhesive. This 0.5mm rock slice is then ground thinner by hand, or in part by using motorised tools, to a final standardised thickness of 30µm (µm = microns or 1,000ths of a mm.)
This thickness allows geologists to identify minerals and name any sedimentary, igneous or metamorphic rock according to the type and amount of the minerals observed. Dorset building stones however, are almost invariably sedimentary rocks (clastics and carbonates) comprising very few minerals which are relatively easy to recognise. Clastic rocks (mudstones, shales, sandstones, conglomerates) are usually easy to recognise but determining the variety of limestones used as building stones can be more of a challenge. One has to study the composition of the carbonate components (ooids, shell debris, microfossils) that these rocks, fashioned variously by man or machines into dimensional stone, actually contain. Thin sections can often distinguish a certain building stone when the macro features are inconclusive.
The polarising microscope, a Victorian invention still used today notably in the oil industry and by mineralogists of every kind, has two polarised-light filters installed, one above and one below the microscope stage that hold the thin section. Looking down this microscope with just one polarising filter in use gives us a Plain Polarised Light (PPL) view of any rock slice at any chosen magnification. The PPL view of 30µm minerals reveals the linear relief of minerals perfectly but the organic fabrics at that thickness are very much removed – so our thin sections are commonly ground to only 50µm so that clear bioclastic components, typical of that stone, are well revealed.
When two polarisers are used and the rock slice thickness is ground down to 30µm the history of any sedimentary stone’s diagenesis – its final mineral structure as a rock and its potential as a building stone can often be better known. This Cross Polarised Light (XPL) view is composed of a finely graded range of so-called interference colours that best reveal the mineral content and for us to learn more about nature and origin of the non-bioclastic components of freshwater as well as marine sediments. Sometimes just looking at both PPL and XPL images we learn to see just what proportions of minerals and bioclastic particles are in any stone that interests us and better understand its qualities.
Once a rock slice has been ground to the required thickness it can be stained to reveal more about any iron content, oxidisation and therefore colouring of any sedimentary stone. The final required thickness is determined usually by thin-section makers from the XPL colour revealed down the microscope by any quartz silt or sand in the given stone slice as it is ground thinner on plate glass by a slurry of carbide and water. Every mineral under XPL light has a particular colour revealed at every thickness. Every quartz sand grain is yellow, yellow grey or dirty black at 50µm and white, yellow-grey or dark black at 30µm.
The final stage in making a rock thin section that is fully completed and as wished for, is to glue a thin cover slip of glass over the rock slice to protect it from disfiguring scratches. Production of any one slide takes some many days if resins are allowed to fully harden. A good hand-made slide takes some three hours of skilled work from start to finish because the 30-50µm thick two faced ground rock slices, glue thickness faces and glass slide faces must be made and kept perfectly parallel. Very highly expensive automated commercial systems take maybe 20 hrs. just in the grinding.
|
4) Comparison with exposures (JT)
Studying stone in its natural place in the landscape is the best way to understand the relationship between the landscape and the local building stones. The most obvious natural exposures are the cliffs of the Jurassic Coast, where erosion by the sea and weather keeps the stone free of vegetation. However, not all of the stones used for building are accessible and, in many cases, the cliffs are dangerous. Please take note of any warnings. Man-made exposures will firstly be small quarries on the tops of the hills. Their depth will depend on the thickness of the individual beds of stone that are suitable for building. The problem here is that vegetation has obscured most of the historic quarries, though the Dorset’s Important Geological Sites Group (DIGS) are doing their best to keep some of the quarries clear (www.dorsetrigs.org.uk). If you venture into farmland or any private land, please ask for permission. Other man-made outcrops will be road cuttings or the sunken holloways of ancient footpaths. Rail cuttings are also excellent but can only be visited if on a disused railway. In the case of such cuttings, the harder stone will become prominent through long-term weathering. Present day working quarries are dangerous places, with machinery and loose rocks. Some allow group visits, given sufficient notice.
|
Inland natural exposures on the tops of hills may consist of the hard building stones that are more weather-resistant than shales or clays originally above or still in place below. Often following a hill-top footpath will find these. Exposures on the sides of hills are often more difficult to reach, but can be seen from a distance, where weathering of a softer bed below a harder one can expose a potential building stone. In several cases the harder rock has slipped over the softer bed, and become prominent on the leading edge of a landslip.
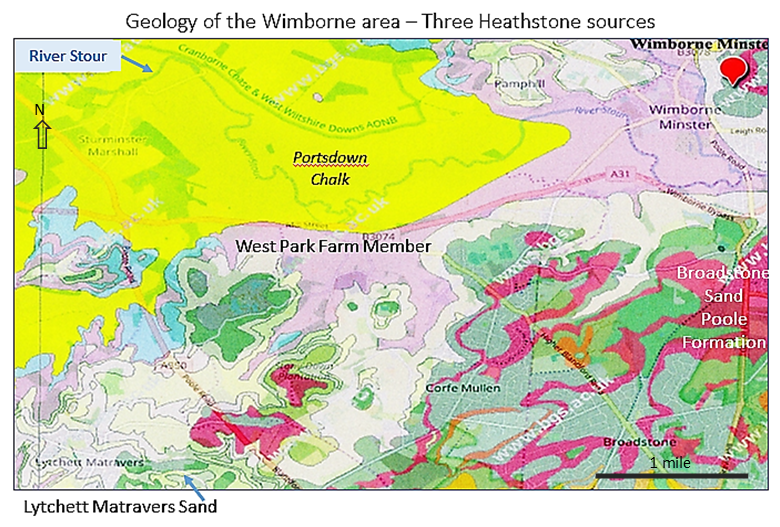
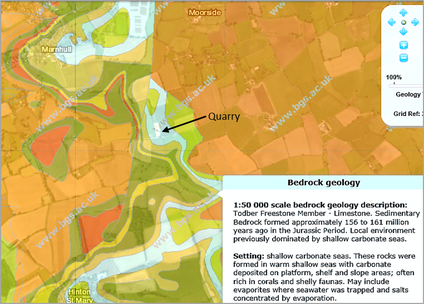
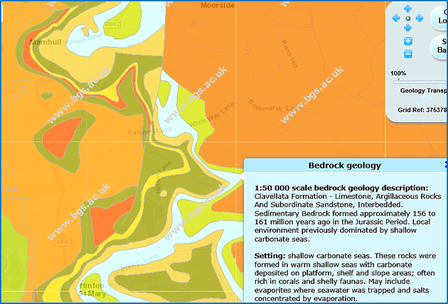
Essential aids to identifying building stone sources are the geological maps by the British Geological Survey (BGS). These BGS maps are available UK-wide at 1:50,000 scale (paper) and can also be accessed digitally at: http://mapapps.bgs.ac.uk/geologyofbritain/home.html The detail increases as one zooms in. It is best to start with the Bedrock-only option. The base map can be changed to the Google Map Image and the transparency of the geological overlay can be varied. This is useful for comparing with more detailed Google Map images and historical maps. Clicking on a colour gives a drop-down box with geological information. (see BGS graphics below) |
Images and text by PJB, JT, WGT March 2017 Contains British Geological Survey materials © NERC 2017

